///

Open Reduction Internal Fixation of a Monteggia forearm fracture dislocation using the Synthes small fragment LCP plate

Learn the Open Reduction Internal Fixation of a Monteggia forearm fracture dislocation using the Synthes small fragment LCP plate surgical technique with step by step instructions on OrthOracle. Our e-learning platform contains high resolution images and a certified CME of the Open Reduction Internal Fixation of a Monteggia forearm fracture dislocation using the Synthes small fragment LCP plate surgical procedure.
A Monteggia fracture-dislocation is a fracture of the proximal one third of the ulna and an associated dislocation of the radial head and is named after Giovanni Battista Monteggia who described it in 1814. Monteggia fractures are thought to occur from a fall on to a hyper-pronated forearm / hand. They are relatively uncommon with an incidence of between 1% to 2% of all forearm fractures. They are more frequently seen in children compared to adults however, the literature and treatment options must be interpreted with caution as the groups are often mixed together.
The forearm comprises two bones (radius & ulna) that are held together at different levels by different soft tissue structures. Distally the forearm is connected at the Distal Radio-Ulna Joint (DRUJ) by the Triangular FibroCartilage Complex (TFCC). In the mid-portion the bones are connected by the interosseous membrane and proximally the radius is held by the annular and quadrate ligaments. The annular ligament arises from the anterior and posterior aspects of the radial notch in the proximal ulna. The annular ligament is a strong band of fibres that encircle the proximal radius, maintaining its position in the radial notch but also allowing it to freely rotate during supination and pronation. The quadrate ligament arises from the inferior border of the radial notch on the ulna and connects directly to the radial neck. Its’ function is to increase the stability of the Proximal Radio-Ulnar Joint (PRUJ) and restrict excessive supination / pronation.
The Synthes Locking Compression Plate (LCP) has uniformly spaced combination (combi) holes. The plate can be applied in any of the following modes:
Compression
Bridging
Neutralisation
Buttress
Tension band
The combi holes can accommodate standard cortical / cancellous screws and locking screws. The combi holes are a mirror image relative to the middle of the plate. This places the threaded hole section (for locking screws) closer to the fracture and the dynamic compression unit (DCU) side of the hole is furthest away from the fracture. This means that with eccentric cortical / cancellous screw placement, then compression is achieved at the fracture site.
As the plates allow the insertion of locking screws, this converts the construct into a fixed angle device and you do not need to rely on plate/bone compression to maintain the stability of the construct.
The small fragment LCP plates will accept the following screw sizes:
3.5mm cortical screws
4.0mm cancellous screws
3.5mm locking screws

INDICATIONS
In adults, all Monteggia fractures should be treated surgically with an anatomical reduction and stabilisation of the ulna, this usually reduces the dislocated radial head.
SYMPTOMS & EXAMINATION
A forearm fracture is usually very painful and this type of fracture often results in a very swollen elbow with a restriction of movement. There will be swelling and sometimes bruising. Rarely a forearm compartment syndrome may develop.
An examination will reveal limited elbow movement which is very painful. A hand examination is essential and you must thoroughly examine and document the findings. The autonomous zones for the peripheral nerves are:
Radial (dorsal 1st webspace)
Median (index finger pulp)
Ulnar (little finger pulp).
To examine the motor component of each nerve, ask the patient to place the hand palm downwards:
Extend the wrist (radial nerve)
Extend the fingers (PIN: posterior interosseous nerve – terminal branch of the radial nerve)
Abduct the fingers (ulnar nerve)
Turn the hand palm upwards and abduct the thumb (median nerve)
Form an ‘OK’ sign (AIN: anterior interosseous nerve – terminal branch of the median nerve).
This injury can cause an isolated injury to the PIN due to its proximity to the proximal radius.
IMAGING
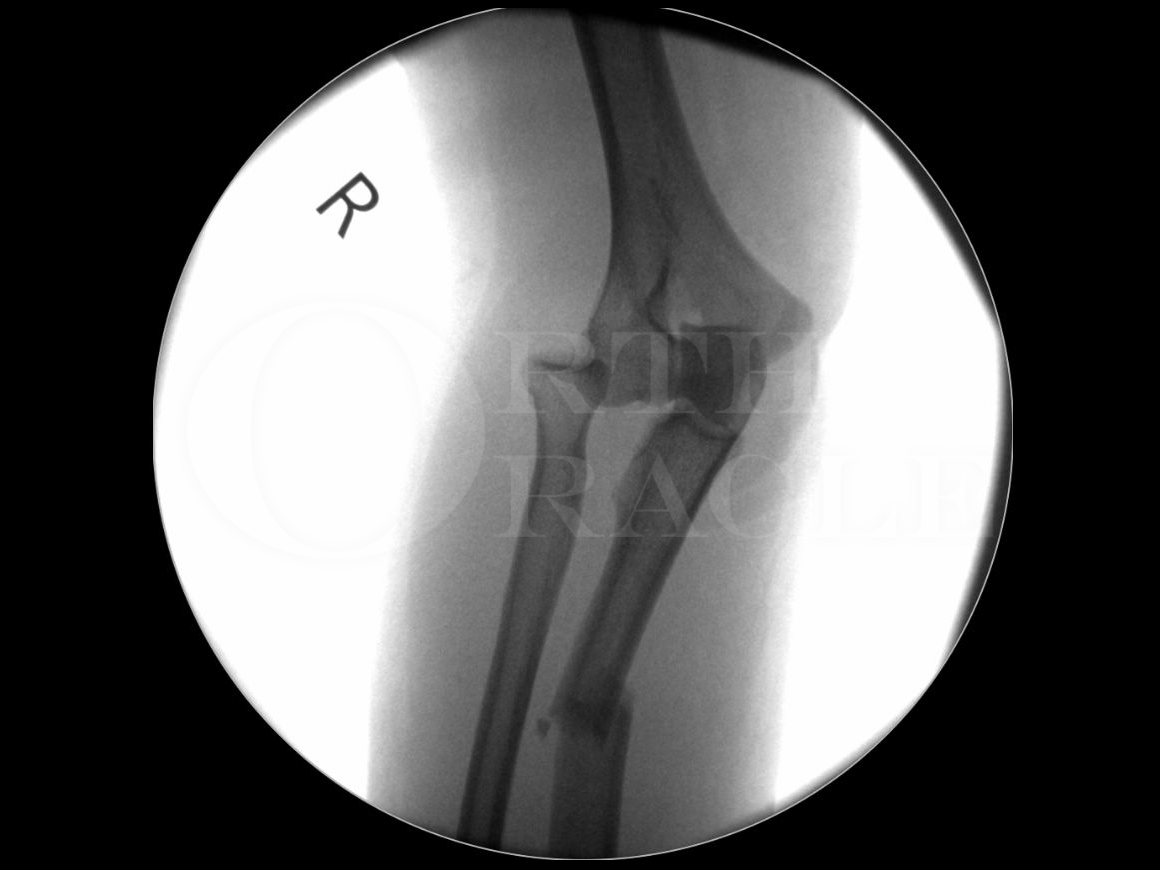
Plain X-Rays of the elbow, Antero-Posterior (AP) and Lateral (Lat), are usually sufficient to make the diagnosis.
In the acute injury MRI has no role. A CT scan however may be useful as it might reveal another occult injury (e.g. radial head fracture, coronoid fracture) or can be used to clarify these if there is anything suspicious on the plain imaging.
ALTERNATIVE OPERATIVE TREATMENT
In adults an ulna fracture requires anatomic reduction and rigid stabilisation. This is usually sufficient to reduce the dislocated radial head.
If there is a displaced radial head or coronoid fracture, these should also be treated with open reduction and internal fixation. Occasionally an un-reconstructable radial head fracture will require replacement. This is important if there is longitudinal instability of the radius, as this can lead to an Essex-Lopresti type DRUJ pathology or ongoing elbow instability, as the radial head is a primary stabiliser. Radial head replacement for this indication can also be read on OrthOracle Radial Head Replacement Using Evolve Proline Modular Radial Head System (Wright Medical)
In children, often a simple manipulation under anaesthetic and application of an above elbow plaster of paris is sufficient. Alternatively the ulna can be stabilised with an elastic nail.
NON-OPERATIVE MANAGEMENT
For any forearm fracture that disrupts the axis of rotation (supination / pronation) non-operative management is not recommended. The forearm axis of rotation is from the centre of the radial head to the centre of the ulna head. If the axis is disrupted, this means that there will be a consequent loss of forearm rotation which can lead to significant disability. It should only be considered if surgical treatment is not possible.
CONTRAINDICATIONS
The only contraindications for surgical fixation are:
Infection
Large soft tissue defects requiring delayed reconstruction
Anaesthetic (general / regional) contraindications

A large number of surgeons would choose to operate with the patient in a lateral position with the patient’s arm over an appropriately padded rest or gutter.
An alternative technique is to have the patient supine with the arm flexed up over the patient’s chest. Often a pillow on the chest is helpful to prevent over-flexion of the elbow which displaces the reduction and the pillow also provides some protection for the chest. The patient’s axilla must rest on the edge of the operating table, as this will give enough room to bring in the C-arm and have the elbow in the centre of the detector. In this case, the patient had multiple rib fractures, so was kept in a supine position.
Intravenous antibiotics are administered.
A tourniquet is applied and inflated to 250mmHg. I do not exsanguinate the limb using either an Esmarch bandage or Rhys Davies exsanguinator. I simply elevate and gently squeeze to allow the veins to collapse but still contain some blood, so that I can see them and then haemostases them if required. Some surgeons prefer to use a sterile tourniquet however, as we are not extending the incision above the elbow, I do not feel this is necessary.
The other benefit of the supine position is if the radial head needs reconstruction, then an arm table can be used.

The AP radiograph of the elbow demonstrates that there is a proximal one third fracture of the ulna and with closer inspection it is possible to see that there is a radio-capitellar dislocation.

The lateral radiograph demonstrates that the proximal radius is dislocated anteriorly.
The anatomic axis of the radial neck (not the radial shaft) should always pass through the centre of the capitellum regardless of the forearm position e.g. supination / pronation.

The elbow, forearm and hand are prepared with antiseptic.
A tourniquet has been applied with an impermeable guard to prevent the alcoholic antiseptic from soaking into the wool padding.

The surgical drapes are applied and the arm position is checked to ensure that it can freely move without being restricted by the drapes.To recap the setup, the patient is supine with their axilla of the injured arm overlying the edge of the operating table. The chest wall and hips are also in line with the edge of the operating table. The patient’s arm must always be supported by the operating surgeon or assistant and is rested across while operating and extended over the C-arm detector when imaging.

The C-arm is positioned so that the detector can be draped with a sterile cover and act like a table to support the arm, once the arm is prepped and drapedThe monitors are also positioned accordingly to allow easy viewing.

A traction view screened with the intensifier is used to demonstrate the direction that the radial head has dislocated.There are also no obvious fractures to the radial head or coronoid process which could block a reduction.
To obtain the traction view, extend the arm and elbow over the C-arm detector and gently apply traction to the forearm while imaging. Do not apply unopposed traction because the patient is on the edge of the operating table and could potentially fall off.
Bado classified Monteggia injuries into 4 types, he noted that the apex of the ulna fracture was also in the same direction as the radial head dislocation:
Anterior dislocation of the radial head and a diaphyseal ulna fracture
Posterior dislocation of the radial head (often have an associated radial head fracture)
Antero-lateral or lateral dislocation of the radial head and a metaphyseal ulna fracture.
Anterior dislocation of the radial head and a proximal third diaphyseal fracture of both the ulna and radius.
It is tempting to think that this is a Bado type 3 because of the antero-lateral appearance to the radial head but it should be noted that the ulna fracture is diaphyseal (type 1) and not metaphyseal (type 3).
Jupiter et al. have sub-classified the posterior Monteggia lesions (Bado type 2):
Type IIA – Coronoid process
Type IIB – Ulnar metaphysis
Type IIC – Ulnar diaphysis
Type IID – Complex ulnar fracture extends from the olecranon to the diaphysis
Bado JL. The Monteggia lesion. Clin Orthop Relat Res. 1967; 50: 71-86
Jupiter JB, Leibovic SJ, Ribbans W, et al. The posterior Monteggia lesion. J Orthop Trauma. 1991; 5: 395-402

The incision is along the subcutaneous border of the ulna running from the olecranon to the ulnar head. The surgical plane is between the flexor and extensor compartments of the forearm.I like to identify the level of the fracture radiographically to ensure that my incision is appropriately centred.
I am a firm believer in drawing out and planning you incisions, as it allows you the opportunity to change your mind if necessary.
The incision length is determined by the length of the plate that is required to adequately stabilise the fracture.

Haemostasis is paramount in upper limb surgery. There are often lots of superficial veins which can bleed vigorously and if not haemostased will bleed profusely when the tourniquet is deflated.

Once through the subcutaneous fat, the deep fascia is incised in the line of the skin incision.It is always important to remember your orientation. The aspect of the elbow closest to the chest or feet is the medial side (marked A). The aspect closest to the head is the lateral side of the elbow (marked B).
The ulnar nerve is located on the medial side of the elbow. The nerve is posterior to the medial epicondyle and then runs through the cubital tunnel. The nerve passes under Osborne’s ligament and continues into the forearm under the Flexor Carpi Ulnaris (FCU) muscle and deep to the flexor-pronator aponeurosis.
When splitting and opening the deep fascia, the aim is to be between the FCU and Extensor Carpi Ulnaris (ECU) muscle bellies.

The muscle can either be split in the same line or find the fascial plane between the muscles and then track this down to the bone, as the plane of muscle cleavage.The muscles distally are Extensor Carpi Ulnaris (ECU – marked B) laterally and Flexor Carpi Ulnaris (FCU – marked A) medially (remember the medial side of the elbow is marked C). Closer to the olecranon, then on the lateral side you will encounter Anconeus.
The Anconeus can be identified by looking at the direction of the muscle fibres. It inserts into the proximal ulna and the muscle fibres run obliquely across the elbow (and approximately 45 degrees to the flexor / extensor muscle fibres).

Sharp dissection is used to release the muscle / periosteum from the bone.If access to the radial head is required, to address a radial head or coronoid fracture or remove an interposed structure, then either the Speed and Boyd approach or the Kocher approach to the elbow can be utilised.
Both the Speed and Boyd approaches incise the anconeus along its’ insertion on to the proximal ulna. The anconeus muscle is then reflected distally with the supinator muscle. This exposes the posterior elbow capsule. The posterior interosseous nerve (PIN) is protected within the supinator muscle.
The Kocher approach is between the anconeus and the extensor carpi ulnaris (ECU). The anconeus is retracted proximally and the ECU distally to expose the radial head and annular ligament.
If ulna fracture is diaphyseal, then I would favour using a Kocher approach however, if the ulna fracture is metaphseal i.e. more proximal, then I would use a Speed and Boyd approach.

A periosteal elevator is used to clear the muscle and periosteum from the bone so that the fracture can be adequately visualised and the footprint for the plate is cleared.In this location and staying close to the bone, there are no structures at risk.

The bone ends are delivered into the wound and cleaned of any fracture haematoma that may prevent reduction.

Two lobster (crocodile) clamps are applied to the bone either side of the fracture.These will be used to manipulate the fracture fragments to achieve the reduction.

To reduce the ulna fracture, the first step is to reduce the dislocated radial head.In the photograph the assistants hand (marked A) and thumb position are absolutely critical as these are doing most of the work to reduce the fracture. By reducing the radial head into the radio-capitellar joint, the ulna length is restored.
To reduce the radial head, the forearm is pronated (remember the mechanism of injury is thought to be from a hyper-pronated forearm with axial load). Traction is applied with a varus angulation of the elbow. The elbow is held in approximately 30-90 degrees of flexion and the radial head is pushed by the assistants thumb to help reduce it.

The lobster (crocodile) clamps are used to execute the final reduction and correct the length, angulation and rotation.The fracture can be seen to have keyed together as each side of the fracture interdigitates with its’ opposing half.
On this surface there is no comminution however, on the radiographs a small fragment can be seen. Anatomically the bone is fairly uniform in shape (smooth curve) on this aspect, so no obvious clues to the rotation. The fracture configuration and interdigitation is essential to reliably ensure the rotation has been corrected. The angulation and alignment can be checked both visually and radiographically.

A plate of the correct length is then selected and positioned on the bone so that the central hole (hole number 4) is placed over the fracture.A 7 hole plate was selected as this will allow 3 holes (6 cortices) either side of the fracture and no screw will be positioned too close to the fracture or perhaps end up in it.
In this case, we have not used a lag screw as the fracture pattern is transverse.
Often the plate will need to be contoured, especially if using the plate in compression mode, as you can get opening of the far cortex fracture gap.

The first hole is drilled for a 3.5mm cortical screw using the 2.5mm drill bit, located either proximal or distal to the fracture, then measured, tapped and inserted.The plate can be held on to the bone with a clamp such as a Verbrugge Bone Holding Forcep however, I often find that they require additional soft tissue stripping and sometimes get in the way.
I prefer to use the 2.5mm drill bit tip to feel for the medial and lateral edges of the bone and then drill a hole centred on the crest of the bone. This hole should be concentric within the plate hole, otherwise the plate will translate a few millimetres as the screw head engages with the plate. This can cause the plate to be malaligned with the axis of the bone or change its position relative to the fracture.
The cortical screw hole is drilled using the 2.5mm drill bit and the spring loaded drill guide. To ensure that the drilled hole is concentric and centred within the plate hole, the spring loaded drill guide can be pushed into the plate hole which centres it.

The drill hole depth is measured (and tapped if required) and then an appropriate length screw is inserted.
In my unit we are moving to self-tapping 3.5mm cortical screws that do not require the drill hole to be tapped prior to screw insertion. The screw isn’t fully tightened, so that the plate is still able to rotate around the screw and its’ proximal position can be adjusted. It doesn’t matter whether you insert the screw either proximal or distal to the fracture first.
In terms of screw order, if the plate holes are numbered 1 to 7 from proximal to distal. Hole 4 is over the fracture and I like to insert non-locking / cortical screws into plate holes 3 and 5 first. This pulls the fracture to the plate and more accurately corrects the bone alignment.
Also the combi hole has the DCU portion furthest away from the fracture therefore if your fracture line is oblique, there is a small chance that a locking screw might inadvertently end up in or through the fracture.

A second hole is drilled through the plate on the opposite side of the fracture to the first.In the image it is possible to see that plate hole 4 is overlying the fracture.
The spring-loaded drill sleeve is not pushed down into the plate hole and the drill bit is positioned eccentrically within the plate hole. This is deliberate to allow the screw head to cause compression at the fracture site. As the screw is tightened and inserted, due to the shape of the screw head, the plate must move proximally so that the screw head can sit centrally within the plate hole. This causes compression at the fracture site.

A second cortical screw is inserted using an eccentric compression technique.In this case, only one screw will be used eccentrically to compress the fracture. This is because the fracture was already well reduced.
It is possible to achieve additional compression and here are a couple of techniques to achieve this:
Loosen the first cortical screw and pull the plate proximally so that the screw is positioned eccentrically within the plate hole. A second screw is inserted proximally using an eccentric technique. When both screws are tightened, they will engage with the plate and cause it to move in both directions i.e. away from the fracture. This technique will give double the amount of compression, as both screws are causing compression at the fracture site.
An alternative method is to keep the first (distal) screw tight. This is the static portion of the plate / bone construct. A second screw is inserted eccentrically as described in the technique and fully tightened. A third screw is drilled eccentrically into the proximal (mobile) portion of the plate. As the third screw is tightened and starts to engage with the plate, the second screw is loosened to allow further plate movement within the mobile portion of the construct. The third screw is fully tightened now, followed by the second screw which will now be slightly eccentric – closer to the fracture, than it was previously.

The initial fracture reduction and fixation with the first two schools is checked using the C-arm.The patient’s arm is extended away from the body / operating table and over the C-arm detector.

The fluoroscopic image demonstrates that the fracture has been reduced and the length, alignment and rotation have been corrected.
The radial head is also inspected to ensure that it is congruently reduced at the radio-capitellar joint.
The plate is also appropriately centred on the bone.

The fluoroscopic view of the elbow demonstrates that the radial head has been reduced and the proximal ulna fracture is also reduced and correctly aligned.
This image is obtained by internally rotating the shoulder and flexing the elbow to 90 degrees. The C-arm is kept in exactly the same position as it was for the previous AP image. With the patient in the supine position, it makes obtaining orthogonal view images easy.

For the third screw the screw-in threaded drill guide for the 2.8mm drill bit is now inserted into one of the locking screw plate holes and drilled.The threaded drill guide screws into the plate and ensures that the holes are perfectly perpendicular in all planes and concentric with respect to the plate holes.
The drill bit for the 3.5mm locking screws is 2.8mm

The hole for the locking screws is drilled with the 2.8mm drill bit.
The 2.8mm locking screw drill bit is calibrated and marked with screw lengths. Once it is across the bone medullary cavity and rests up against the far cortex, then the drilling is stopped and the hole depth is measured off the drill bit and read against the top of the threaded drill guide. Depending on the age of the patient and the thickness of the bone cortex, if you add 2-4mm to the measured depth, this should give an appropriate length screw.

The 3.5mm locking screws are inserted with a torque-limiting screwdriver.The torque screwdriver prevents the screw from being overtightened and cold welding to the plate. If the screw is overtightened, then future removal may be very difficult and occasionally impossible.

The process for drilling and measuring the locking screw is repeated for the remaining threaded holes and screws are inserted.
The screw in threaded drill guide is inserted into the plate.
The hole is drilled until reaching the far cortex.
The hole depth is measured from the calibrated drill and 2-4mm is added to the measurement.

The remaining locking screws are inserted.
It should be noted that once a locking screw has been inserted into the construct, then a cortical screw should not be used. This is because a cortical screw relies on plate / bone compression. Once a locking screw has been inserted, the distance of the plate from the bone has been fixed because the locking screw head engages with the plate. Therefore if a cortical screw is then inserted, the plate cannot be pulled any closer to the bone and the construct strength is determined by the bone / screw interface. For locking screws, this isn’t a problem as the screw engages with the plate creating a fixed angle device. Whereas for the cortical screws, any plate / fracture micro-motion will be transferred to the bone / screw interface which is susceptible as the plate cannot be compressed on to the bone (which limits its’ movement) and the screw head can toggle in the plate hole.

Final images are taken to ensure that the reduction of the radial head is congruent and stable, and the ulna fracture has been anatomically reduced.Using the C-arm detector as a sterile table, it is easy to support the elbow and keep it steady to acquire clear images. Also it may be necessary to use a little bit of tilt on the C-arm to obtain a true lateral of the elbow.

This is a true lateral image of the elbow and demonstrates that the radio-capitellar joint has been congruently reduced.
Remember that the radial neck anatomical axis should always intersect through the centre of the capitellum regardless of the forearm position.

The AP radiograph demonstrates that the fracture’s alignment has been corrected and the elbow joint is congruent and equally spaced (radio-capitellar vs ulno-humeral).
If the joint space is slightly wider, then it could be because there is some soft tissue interposition e.g. annular ligament, joint capsule, fracture fragments, posterior interosseous nerve.

This image demonstrates that the plate has been correctly sited on the dorsal cortex of the ulna and is satisfactorily aligned with the bone.
It is sometimes tempting to place the plate on either the medial or lateral side of the ulna to reduce the risk of the hardware being uncomfortable for the patient i.e. painful if they lean on the proximal forearm. Any temptation to place the plate on the ‘wrong’ side of the bone should be strongly resisted!
The plate functions far superiorly in tension and can easily resist any deforming forces. If the plate is placed on either the medial or lateral surface of the ulna, then all of the forces are focussed on the bone/screw interface or the screw/plate interface. Either way, it will probably fail and precipitate a mal/nonunion. Irritating metalwork is much easier to remove compared to salvage surgery for mal/nonunion.

The elbow is imaged with the forearm in supination.

The elbow is imaged with the forearm in pronation (note how the radius and ulna crossover).
This demonstrates that the radio-capitellar joint is congruent with an unrestricted range of motion and importantly that it is a stable reduction.
If the range of motion is restricted or the joints are not congruent, then the next step is to pause and plan how to proceed. It is likely that something is within the joint and is blocking the movement or interposed and causing the incongruence. Full fluoroscopic imaging should be obtained first before making any further incisions. A radial head or coronoid fracture or displaced fragment should be ruled out as the first step. A second step should be to check that the ulna reduction and stabilisation are anatomic. Then either a Kocher or Speed and Boyd approach can be used to access the joint to see if there is some soft tissue interposition.

The wound is thoroughly irrigated with saline to remove any haematoma or bone swarf created by the drill.The presence of haematoma or bone swarf may contribute to developing a post-operative wound infection.

The muscle fascia is sutured to provide a layer of tissue covering the metalwork.

Deep dermal interrupted absorbable sutures are used to oppose the wound edges.For wounds that require strength or overlie a joint and so require movement, I like to use interrupted sutures. If a throw of a continuous suture were to fail, then the whole wound repair would be de-tensioned. Also for wounds that need to stretch longitudinally near a joint, then I feel interrupted sutures are more likely to allow this and not limit the wound / skin excursion.

The deep dermal sutures have been inserted using an inside-out technique i.e. start deep on the inside and exit the wound superficially just below the skin surface, and then enter the opposing wound edge superficially and then exit deep on the inside. This places the suture knot deep within the wound and away from the skin surface.

The final layer of the wound closure is with a subcuticular absorbable monofilament suture.For the skin that is more mobile compared to the deeper structures, I like to use a continuous absorbable suture e.g. Monocryl.
I do not use a drain, as there are no bleeding surfaces (e.g. bone) that haven’t been haemostased during the procedure. I’m therefore not expecting a haematoma to form.

The wounds are dressed with a non-adherent dressing.
Personally I prefer non-adherent dressings compared to adhesive dressings. I find that when patients return to clinic, the adherent dressings are sometimes difficult to remove and the patient’s are perhaps oversensitive as they are anxious about what will happen to them.
The non-adherent dressings usually just fall away with bandages and this is much easier than trying to peel a sticky adhesive dressing off and pull the patient’s skin hairs out.

An above elbow wool bandage is applied, then finally a crepe bandage.Importantly when bandaging an elbow, please ensure that the elbow is bandaged in 90 degrees of flexion. This allows a greater functional range of motion and also means that the bandage doesn’t concertina in the antecubital fossa causing uncomfortable compression on the elbow structures.

Finally a crepe bandage is applied.
I do not use a backslab, as I have confidence in my surgical fixation and construct rigidity. I also do not have a wound that would be subject to any shear forces should movement be commenced immediately.
Importantly the biggest consequence of this injury will be elbow stiffness, I therefore like to start immediate elbow range of motion exercises (flexion / extension, and supination / pronation).

Distal neurovascular assessment:
If placing the plate on the dorsal surface of the ulna, you should avoid the ulna nerve which is on the medial side of the elbow.
The posterior interosseous nerve also needs to tested, as the dislocated radial head can cause an isolated injury to this nerve.
Immediate gentle elbow range of motion exercises (flexion / extension, and supination / pronation). No heavy lifting or loading of the forearm / elbow for 6 weeks or until signs of union.
When attending the clinic at 2 weeks post-op:
X-ray on arrival to check the fracture and radial head reduction
Wound inspection +/- removal of any sutures
Discontinue using a sling (if wearing one) and strongly encourage range of motion exercises.
Referral to physiotherapy and forewarn the patient that they will lose some elbow range of motion but that they must work hard early on to minimise this.
Further follow up in 4 weeks and then at 6 week intervals with x-rays at each attendance until the fracture has united (or is making satisfactory progress towards union).

In 1955, Watson-Jones noted only 2 good results among 34 Monteggia fracture-dislocations in adults. Earlier he had stated that “no fracture presents so many problems; no injury is beset with greater difficulty; no treatment is characterised by more general failure”.
Ring et al. noted that posterior Monteggia injuries have higher rates of recurrent instability and worse outcomes compared to the more predictable anterior dislocation injuries.
In a paper by Klug et al. they retrospectively reviewed their series of Monteggia-like lesions i.e. a proximal ulna fracture and an associated radial head fracture. They concluded that treatment of the coronoid and radial head fracture were required to provide elbow stability. In their opinion, all Mason type II and III fractures amenable to reconstruction should be rigidly fixed and good outcomes can be achieved.
In non-reconstructable injuries, without ligamentous instability, a radial head replacement did not provide better outcomes compared to radial head excision at mid-term follow up (4.6 years). However, if there were a ligamentous injury then radial head replacement was indicated to allow functional rehabilitation.

Watson-Jones R. Injuries of the forearm. In: Fractures and joint injuries. 4th Edition. Baltimore (MD): William and Wilkins; 1955. 572-81
Ring D, Jupiter JB, Simpson NS. Monteggia fractures in adults. J Bone Joint Surg Am. 1998; 80(12): 1733-44
Klug A et al. Surgical treatment of the radial head is critical to the outcome of Monteggia-like lesions. Bone and Joint Journal 2019; 101-B: 1512-19


Reference

  • orthoracle.com
Dark mode powered by Night Eye