///

Double fusion (Tibiotalocalcaneal fusion) with De Puy Versa-Nail

Learn the Double fusion (Tibiotalocalcaneal fusion) with De Puy Versa-Nail surgical technique with step by step instructions on OrthOracle. Our e-learning platform contains high resolution images and a certified CME of the Double fusion (Tibiotalocalcaneal fusion) with De Puy Versa-Nail surgical procedure.
The fixation of a double fusion using an intra-medullary nailing technique is one of the commoner options utilised for combined Ankle and Subtalar degenerative change with or without deformity. It is a technique that should also be considered in revision ankle fusion cases without Subtalar arthritis and neurological cases presenting with ankle and hindfoot instability rather than deformity.
In the correct patient (and using intra-medullary nail fixation) early load bearing may be achievable. Union rates in many published series are in excess of 90%.
It can however be a technically challenging and relatively long operation to perform.
The implant technique detailed is for the De Puy Versa-nail but the preparation of the arthrodesis described is the same irrespective of the implant type and to a large extent the technique also. A number of the technical details relating to the required steps during intra-medullary nailing are also shared with other nailing systems.

INDICATIONS:
Combined severe Ankle & Subtalar osteoarthritis: This may be with or without deformity. In the presence of deformity it is key to identify accurately where the deformity lies so it can be fully corrected. This is best defined with CT or MRI.
Revision Ankle Fusion: In the presence of isolated Ankle arthritis that has failed to unite with an appropriate technique argument can be made for increasing the rigidity of the construct used for the second operation by using a nail and fusing both ankle and subtalar articulations. It is also a useful way of stabilising across areas of bony loss (prior to packing with bone graft).
Severe Ankle Arthritis with mild subtalar arthritis: This indication is more of a balancing act . The functional outcome after isolated ankle fusion is likely in most to be less restricted than after a double fusion, especially with a mobile subtalar joint. If there is some subtalar arthritic change already and this progresses after the isolated ankle fusion then it is well recognised that a subsequent secondary subtalar fusion will have a lower chance of success than one done as a primary operation together with the ankle fusion .
Ankle & Hindfoot deformity in the adult neurological patient: Most commonly this is an unstable & varus ankle +/- subtalar joint ,with or without arthritic change .
SYMPTOMS & EXAMINATION:
Most patients with severe ankle & subtalar arthritis localise the pain well to the joints. Very much as with arthritis elsewhere symptoms tend to progress from early activity /start up pain which eases off through to progressively more disabling and continual weight bearing pain and on occasion as far as pain at night or at rest. A much less common symptom which can co-exist with pain is that of ankle and hindfoot instability.
The vast majority of patients will either have a history of a significant injury, chronic deformity (for example Cavo-varus) or a past history of untreated chronic lateral ligament instability. With arthritis of both ankle and subtalar joints the possibility of an inflammatory arthropathy should bear proper consideration.
On examination swelling and tenderness localised to the ankle and hindfoot is common. Range of movement is often reduced and may be uncomfortable. Any deformity should be noted. Varus is most common and valgus and equinus less common. The key issues with any deformity are A:Whether it is passively correctable (or not) and B.:Being sure of its anatomical location(s). The former is easily clinically determined .The latter can be more difficult to be sure on , in particular in the presence of severe deformity and CT is indicated for this.
In assessing equinus it should be appreciated at what level(s) the deformity rests. Beware of associated fixed midfoot equinus which will leave the mid/forefoot in a plantar flexed position once the ankle is fused in neutral if it is ignored. A midpoint plantar fascia release may be all that is required to place the foot in a functional position post-operatively. If dealing with isolated ankle equinus be prepared to add a triple cut (or open )Achilles release dependent on the severity of the deformity. With an open ankle fusion often enough laxity is created in the soft tissue envelope by the bone preparation to allow correction of the equinus.
In neurological cases the 1st ray may be disproportionately plantar-flexed and may require a dorsiflexing osteotomy in isolation .
The foot must be in functional and plantar-grade position at the end of the double fusion and on occasion this may require extension of the fusion into the taol-navicular and Calcaneo-cuboid joints , to rotate and stabilise the foot into a functional position .
The rest of the lower limbs alignment should not be forgotten. In general correction of deformity should start proximally and proceed distally. A varus and arthritic knee should be corrected and replaced before the ankle is fused .
A vascular examination must be made and if abnormal dealt with appropriately.
INVESTIGATION:
There are certain factors which need specific consideration if one is using intra-medullary fixation for a double fusion as opposed to using plates ,screws or a frame. The main one perhaps is that the distal Tibial Diaphysis needs to be wide enough anatomically to accept a Nail .This is best measured from a CT if equivocal. Also there should be minimal or ideally no angular deformity within the lower tibia. If there is ,in particular in the post-traumatic case , then nailing may be precluded (or a short nail may be required).
Plain X-Ray: This is the initial imaging for most patients with ankle and subtalar arthritis of any degree. Though the ankle is relatively well visualised (and the films should be taken weight-bearing) the subtalar and midfoot joints aren’t so well shown , in particular in the presence of associated deformity through the area.
CT scan. This is better in defining how much significant arthritic change exists and where it is than MRI . It is also easier to differentiate the level of deformity from a CT than an MRI . There are cases where significant cystic change exists and will require bone grafting.Its location and extent is again best defined with CT. On occasion the use of structural bone graft to reconstruct deformity may be required .The amount may go beyond what can be harvested from the excised Fibula and planning the requirement for femoral head allograft is a call that is often easier to make from a CT scan.
MRI scan: An MRI is more sensitive for early degenerative change but will be degraded by any internal fixation and though sensitive is not 100% sensitive for early arthritis. It can be more difficult to be objective about the severity of more advanced arthritic change as bone oedema ( a reversible phenomenon which can be present in healthy periarticular bone) complicates the MRI images. A CT lacks this sensitivity. Some surgeons prefer MRI to CT in assessing a joint pre-fusion and this is absolutely legitimate.
ALTERNATE OPERATIVE TREATMENT:
Before commencing a nailing procedure for a double fusion it is wise always to have a back-up plan and alternate form of fixation available which one is used to. For a nailing to succeed the Calcaneus must have been placed operatively beneath the Tibia (to allow a straight line of approach for reaming and nail insertion) , any existing fixation that interferes with nail placement must be removable and the intramedullary dimensions of the Tibia in particular need to be adequate (or be reemable to adequate dimensions) to accept the nail. Though an uncommon occurrence on occasion a nail is not passable for one of these reasons.
Alternate forms of fixation are a combination of large fragment screws ,compressive plates designed for the operation (or condylar blade plates) or external fixation with Hybrid or circular ring fixators. A combination of large K wires and prolonged cast immobilisation is a historical technique one may find detailed in the literature but of no merit compared to modern compressive fixation techniques.

GA or regional anaesthesia
Femoral & sciatic blocks for post-operative pain relief
Laminar flow , peri-operative antibiotics , 2-4 weeks of post operative LMW Heparin
Thigh tourniquet and Flowtron on contra-lateral calf
Ankle positioned into neutral using sandbags & side supports
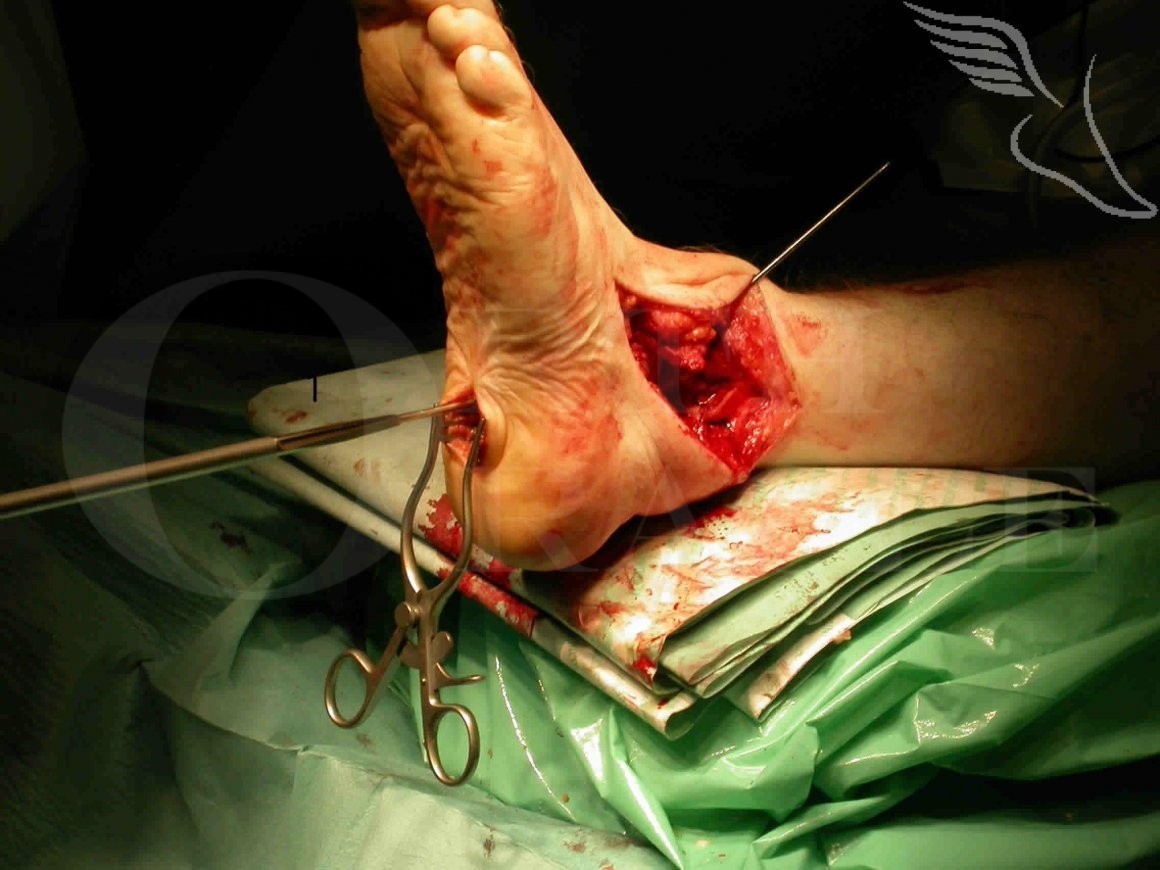
Large , rolled up sterile towels behind the ankle to improve access for cuts.

The approach to both Ankle and Subtalar joints is most commonly an extension towards the 4th metatarsal base of a trans-fibular approach.
The skin incision is in the midline of the Fibula and should extend proximally a good hands-breadth above the tip of the Fibula. Distally it will reach just proximal to the level of the 4th metatarsal base.
In the absence of subtalar deformity preparation of the posterior facet and reaming will in most cases be adequate.

A full thickness flap of skin and fat is raised. The superficial Peroneal nerve may be encountered anteriorly and the Sural posteriorly. They do not need to be dissected out , simply blunt dissect the fat layer in the planned line of deeper extension to reduce the chance of injury (the effects of which will be sensory symptoms ).
Deeper dissection is then with a knife through the Fibula periosteum (1) and the fascia overlying and
the Extensor Digitorum Brevis(EDBr, 2).

Good full thickness skin flaps are shown , the periosteum has been dissected off the Fibula(1) and the EDBr(2) is still intact.

Progressing the soft tissue dissection is aided by the deep placement of an appropriately sized self-retainer (placed very well beneath the skin edges) to tension the soft tissues. A careful sub-periosteal dissection can then proceed using a combination of a sharp knife and large ,round-nosed ,periosteal elevator. The objective at this stage is not only to define the margins of the Fibula(1) but also provide enough soft tissue slack to allow its easy exposure.
Some distal Fibula osteophytes have been removed here to allow a better view at this stage of the lateral Talus and ankle (2) than would normally be the case.
The soft tissue overlying the subtalar joint (3) remains currently intact.


The Fibula is sectioned a hands breadth above the ankle joint level using a large “bread-knife” type reciprocating blade(2). The soft tissues are both moved and protected with two jimmies type retractors(1) .The peroneal tendons are at risk immediately posterior . Medial and deep the risk is more one of notching the Tibia (or if particularly inept slipping into the posterior deep flexor compartment). The cut should be oblique to leave a bevelled end of the Fibula.

Once cut proximally the fibula (2) is still held by significant soft tissue attachments and doesn’t just fall out. These structures ,which need to be divided very close to the Fibula by knife dissection, are the interosseous membrane, the anterior and posterior syndesmotic ligaments, Anterior Talo-Fibular (ATFL) and Calcaneo-Fibular (CFL, this marked 4 on the image) ligaments.
This process is also helped by distraction upon the fibula, here levering with a Large Hibs osteotome (3). Traction distally upon the Fibula using a large “Lions tooth” bone forceps(not shown) is always used. This step requires Orthopaedic perseverance.

Once the fibula is removed the anatomy is much better seen.
The EDBr muscle distally has here also been divided longitudinally in the line of its muscle fibres to expose the anterior process of the Calcaneus (1). Just distal to this will be the calcaneo-cuboid joint. To get this sort of view of the posterior facet of the subtalar joint (2) a sharp sub-periosteal dissection needs to be undertaken beneath the peroneal tendons .The Calcaneo-fibular ligament will also need levering off lateral Calcaneal wall with the large round-nosed periosteal elevator to get this sort of view. The distal Tibia (3) is stripped medially and sub-periosteally (with sharp blade and round nosed periosteal elevator) across its anterior surface (4) to the medial malleolus in preparation for Ankle joint excision.

The postero-lateral edge of the tibia (1) also needs to be defined, carefully with sharp sub-periosteal dissection. The distal tibial bone cut will be from front to back and the posterior soft tissues will need clear demarkation from the bone to avoid injury.

The next step in every case is an exposure of the medial joint line and medial Malleolus(2). A longitudinal skin incision is used , skirting the medial aspect of Tibialis anterior. The medial Malleolus (2) should be exposed by sub-periosteal dissection and its width noted.
An initial vertical cut should be made with a fine power saw(or osteotome as here , 1) a few mm medial to the junction of the Malleolus and Tibial plafond. More width of Malleolus may need to be taken if it has become hypertrophied.
Note that the vertical extent of this cut is also used to mark the depth of tibial plafond that will be removed .
The objective is to remove enough distal tibial articular surface but not to fracture the medial Malleolus. The Malleolus provides stability during fixation and a sound “buttress” for fixation. If the Malleolus fractures it is not the end of the world. The whole construct will be less stable during fixation and there will be less of an anatomical guide as to how to place the ankle so care should be taken when both positioning and when fixing.
With a very severe fixed varus deformity of the ankle it may on occasion be necessary to excise the Malleolus to get a complete correction of the deformity.
The tip of the long reciprocating blade is aimed from its point of lateral joint insertion to the top of the vertical medial Malleolar bone cut( being made here). An assistant is needed with direct visualisation of this medial point to ensure during cutting (performed by the Surgeon through the lateral wound) the cut bone marker is not over or under shot.

To expose the distal tibia adequately for the anterior to posterior Tibial articular surface resection a large Jimmies retractor (1) is placed from lateral to medial to lever up the soft tissues.
At this stage any prominent anterior osteophytes are removed to enable an accurate assessment of the alignment and wear of the tibial articular surface prior to making the cut.

The large reciprocating saw is placed from lateral to medial across the lower tibia. The tip of the blade makes contact with the medial Malleolar cut already produced and care is taken not to go beyond this and risk fracture of the Malleolus.
Before this cut commences it is key that any distal and anterior Tibial Cheilus is excised with an osteotome. Without this anterior “overhang”removed it is difficult to judge properly how much depth of Tibia to resect.
It is necessary to have an assistant both maintaining the retraction of the anterior soft tissue envelope as well as directly visualising the tip of the reciprocating blade medially to ensure the cut is made at the right level
Correction of tibial deformity is “dialled in” to the cut at this stage. The cut progresses from anterior to posterior, exercising care with the posterior soft tissues.
The depth of the cut needs to be adequate to expose good sub-chondral bone but not too much should be removed. Deep cysts at the joint surface do not need to set the level of the resection. They can be drilled and packed with graft.

The medial cut is now being completed postero-medially with an osteotome (3) This is the safest way to finish the osteotomy in this location where the posterior tibial neurovascular bundle is close.
The medial malleolus(2) , the distal tibial articular surface(1) and the talar dome(4) are marked.

The distal tibial articular surface(2) can now be maneuvered out of the joint.
It is important to inspect the cut surface of the Tibia to ensure that a completely flat surface has been produced. Not infrequently small areas need to be chamfered flat.
Once this is done the Talar dome is cut parallel to the tibial cut with the large reciprocating saw blade or fan-shaped oscillating blade.

The parallel Talar(3) and Tibial(1) cuts are now temporarily stabilised with a large K wire (top right) to confirm both stable and good bone to bone contact of the cut surfaces.The resected end of fibula is visible(2).
The cut surfaces of both bones (as well as the perimeters of the bones) should be carefully inspected and chamfered flat with small power saw cuts .

With the ankle joint is exposed(1,6) the subtalar joint is identified by an in-line continuous dissection down onto the middle of the extensor digitorum brevis , which is then reflected. The posterior facet of the Subtalar joint (4) and articulating surface of the talus(5) are separated using a laminar spreader in the sinus tarsi(3). They are then taken back to healthy subchondral bone using a high speed Burr (5 mm ) and osteotomes. The preparation may be rapid and involve little more than the posterior facet itself if there is no Subtalar deformity. The inferior aspect of the Talar head and anterior process of the Calcaneus need to be resected a bit to ensure compression of the joint is not hindered.
In the presence of fixed deformity (or asymmetric wear of the joint) differential amounts of bone may need to be removed (see Triple fusion for further description).
In correcting a severe Valgus deformity the Fibula is a good source for a structural bone block to place laterally.

A stabilizing K wire (2.4 mm diameter or larger) is used to cross both Ankle and Subtalar joints. This needs to be placed away from the middle of the medullary cavity , through which the nail and guide wires will subsequently pass. Especially in a larger limb it is not unusual to require 2 wires, the other placed through the medial skin incision.
It is key to ensure both that the Ankle and Subtalar joints are in an anatomical position and that adequate bony contact exists at both joints in their corrected position before proceeding .
It is useful at this stage also to screen the K wired Ankle/Hindfoot construct laterally with the Image Intensifier. The entry point for the nail in the sagittal plane will be just anterior to the weight bearing surface of the Calcaneus. A wire inserted here should then proceed upwards in the midline of the Tibia ideally.
To enable the Nail to be inserted in this line it may be necessary to align the Calcaneus and Talus non-anatomically (slightly anteriorly or posteriorly translated).
With respect to the guide-wire/nail entry point it is also particularly important that the Calcaneus is placed directly beneath the Tibia in the coronal plane. It should always be remembered that the neurovascular bundle runs very close to the medial wall of the Calcaneus

The heel incision to gain safe access for nail insertion lies between second and third toes and at the junction (from posterior to anterior) of the middle and anterior thirds of the heel fat pad.
Note that the heel is sitting squarely beneath the Tibia. The neuro-vascular bundle lies medially.
After the skin incision the deeper dissection should be with dissecting scissors which are used to blunt dissect open in the same line parallel to the long axis of the heel. As soon as the fat layer is through one can use a blunt probe to confirm the medial and lateral extent of the Calcaneus. The dissection will proceed through the plantar fascia and down onto the bone. One should be aiming for the mid-point width wise of the Calcaneus and to define this point surgically.

The initial threaded guide wire (1) is inserted under power into the Calcaneus . This is done under X Ray control and the objective is to place the wire centrally both within the Calcaneal and Tibial bone .
Time should be taken getting this correct.
It can be difficult obtaining an A-P X-Ray view that shows adequately the entry point on the Calcaneus at the same time as the long axis of the distal Tibia .An Oblique A-P view may help. Once this appropriate alignment of the wire (but not insertion) has been achieved the wire position needs to be maintained by the surgeon and the lateral X-Ray projection checked. The wire must have an entry point that will allow it to run in the midline of the Tibia the sagittal plane.
Once these positions are achieved on AP & Lateral X-Rays the initial threaded guide-wire is inserted under power and checked with the II.
If the ankle and subtalar positioning has not been adequate in the previous stage to allow the wire to be appropriately placed then this earlier stage must be returned to and re-done.
Most often if their is an issue with alignment for the guide wire the heel has not been medialised well enough . Return to the preparation of the medial side of the joint. Removing more width of the medial Malleolus or medial Talar wall will allow further medial movement of the Talus and Calcaneus .
On occasion these measures will still not allow appropriate guide-wire placement . If the guide wire cannot be placed in an appropriate intra-osseous position then this is the time to change the form of fixation for the double fusion to multiple large fragment screws, a plating system or circular frame.

Once an appropriate guide-wire position is achieved,
the nail length is estimated using an AP X-Ray and the supplied Nail length guide.
An initial channel is created with a T handled hand reamer(1)over the guide wire. This is followed by sequentially reaming the medullary cavities with a flexible reamer. The distal De Puy Ace nail is always
12mm diameter. The rest of the nails diameter is either 10mm or 12mm overall , size selected based on the dimensions of the Tibia.
The distal end needs always to be reamed to 12.5 or 13mm and the rest of the channel by 0.5 to 1 mm greater than the nail diameter.
Prior to reaming it is vital to ensure that the reamer hand-piece is in forward and not reverse mode. Reverse should never be used ,even if the instrument is temporarily jarred , as this will cause the flexible reamer to unwind.
During reaming it is key that once reaming has commenced ,and the reamer has been inserted , the process should be continual and under no circumstances should reaming cease with the instrument in the bone, which risks jamming the assembly in situ.
The top end of the reamer should be visualised by X-Ray during the process to ensure adequate depth has been reached to allow nail insertion.
Throughout the reaming it is key that the position of the ankle and subtalar joints is monitored and in particular prevented from lapsing into plantar-flexion which will result in a non-anatomical path for the nail and lead to mal-reduction.

A second additional guide wire(1) is required to hold position whilst reaming for the nail to prevent any movement of the previously reduced ankle and Hindfoot.
It is particularly important to prevent the tendency to plantar-flexion of the foot which occurs during reaming if stability is inadequate.
Prior to commencement of reaming the alignment needs to be checked again as does the adequacy of bone to bone contact across the joints.

The DePuy Ace nail of chosen dimensions is inserted with manual pressure and controlled hammering onto the handle only (never the jig).

The nail is inserted. Its depth of insertion can be confirmed radiographically by screening the distal end with an oblique lateral X ray. It is important to pay attention to the rotation of the nail whilst inserting it. This is to ensure that when the jig is swung under the tibia subsequently for placing the medially located proximal locking screws the jig aligns to the subcutaneous border of the Tibia. If it doesn’t proximal and medial locking becomes an issue later.

There are three distal locking holes(1,2,3) .Not infrequently once the Nail has been seated to an appropriate depth the jig only allows two screws to be inserted into Calcaneum and Talus. The third hole will often sit at a joint line and so can’t be used.
The jigs are purple for distal locking.

Drilling with the drill guide for the second(Talar) screw.
The drills are calibrated but the medial bone here is often relatively soft. It is usually necessary to check the depth of drill penetration independently with an A-P intensifier image.
Care needs to be taken not to over penetrate the medial cortex especially of the Calcaneus given the proximity of the neuro-vascular bundle.

The calcaneal screw (1) is well seated. The talar screw(2) is just being driven home. The ankle joint(3) remains slightly distracted but will be compressed during the next stage.

Once distal locking has occurred compression across the ankle is achieved by several targeted hammer blows onto the flat base of the insertion handle(1). Alternatively two K wires can be inserted into the Tibia , through the proximal jig(3), and compression achieved across the ankle by pulling the nail proximally towards this point of bony anchoring by tightening the jig(3) with a Tommy bar.

The jig is swung from lateral to medial , by rotating around the distal handle. The distal silver button(2, in previous slide) needs to be compressed to free up this rotation.The two proximal locking screws can then be inserted after drilling and measuring.A dynamic locking screw jig is an option proximally.

Pre and post operative xrays of a varus Ankle and Subtalar deformity successfully corrected by intra-medullary nailing.
The technical points to note are the corrective bone cut at the ankle , the Subtalar joint has only been prepared through the posterior facet (middle facet being clearly seen on lateral post union view), the Talar locking screw is as close as one would dare to place it to the ankle joint and the Calcaneal locking screw is obviously too long medially (though avoided the neuro-vascular structures).

Pre and post operative clinical pictures of the same patient who has undergone a right sided double fusion

Pre and post operative images showing the significant amount of correction achievable with Bilateral Double Fusions .
This is a neurological patient with Charcot Marie Tooth disease who presented with ankle pain and instability.
This is the type of situation where a careful examination needs to be made of the forefoot and midfoot. In particular this is to exclude/confirm a fixed plantar-flexion deformity of the 1st ray. If present this will be “driving’ the ankle and hindfoot varus position and will also need correction (by a dorsi-flexing 1st metatarsal osteotomy).

2 weeks in back-slab
dressing changes at 1 & 2 weeks
Complete cast between weeks 2 to 6 & non-weight bear
Some compliant patients with good bone quality and good bone to bone contact at the arthrodesis site may be permitted to transfer into a post-operative boot either at the 2 week or 4 week stage and commence light weight-bearing. If other procedures have been required this is however precluded.
Check X-ray at 6 week stage . Usually may commence light weight bear and progress to 50% body weight by 12 weeks. Dependant upon age , bone quality and co-morbidities, either week
6-12 in a robust post-operative boot or in a walking cast.
Further X-ray at 12 weeks . Satisfactory progression is judged by both radiographic progression as well as a patients comfort upon limited weight-bearing.
Generally a further 6 weeks is required at this stage in a post-operative boot.The progression from partial to full weight -bearing is made during this period.
A further X-ray is performed at 18 weeks to confirm union and if symptoms are in keeping with this the patient may move onto a stiff-soled hiking boot for a further 4 weeks , then normal shoes.
No heavy manual type activity or sport for 5-6 months post operation.
Ultimately , normal shoe wear and activities as able. Following double fusion surgery however patients are more likely to require a shoe with a sole that approaches a traditional through-rocker , or require such a modification to a normal pair of shoes.

Tibiotalocalcaneal arthrodesis using a reamed retrograde locking nail.
Clin Orthop Rel Res 2007 Oct; 463 :151-6.
Boes R, Mader K , Pennig D , Verheyen CC.
50 patients were followed up for approximately 4 years. The ankle was formally prepared surgically and the Subtalar joint was not though all patients underwent reaming of both joints prior to nail insertion.
All ankles united with a mean time to union of 20 weeks , 2 Subtalar non-unions only. Patients were reviewed clinically and radiographically.
Surgical correction of severe deformity of the ankle and hindfoot by arthrodesis using a compressing retrograde intramedullary nail.
Foot Ankle Int 2014. 35 (4): 360-7.
Brodsky JW, Verschae G, Tenenbaum S.
30 cases followed for a mean of 30 months
Just under half of the patients had a deformity over 15 degrees varus or valgus coronal plane . 2/3rds were corrected to a deformity of less than 5 degrees. Union rate of over 96% reported. 10% temporary plantar nerve parasthesia, 10% wound infection and 10% developed a stress response.
Tibiotalocalcaneal arthrodesis with a curved ,interlocking ,intramedullary nail
Foot & Ankle Intl 2010. Dec ;(12):1085-92.
Budnar VM, Hepple S, Harries WG, Livingstone JA, Winson I.
45 fusions followed up for a mean of 4 years. Indications were for failed ankle fusion and replacement and complex ankle and hindfoot deformity. The nail design allowed for a lateral hindfoot insertion as opposed to plantar insertion.
Union rate was almost 90% , over 80% had reduced pain and 2/3rds of patients had improved function. 4 nails required removal
Tibiocalcaneal arthrodesis for the management of severe ankle and hindfoot deformities.
Foot & Ankle International.2000.21(8):643-649.
M.S.Myerson ,R.G.Alvarez ,P.W.C.Lam.
Condylar balde plate used for a mixture of pathologies ( including failed primary surgery and 8 cases of osteomyelitis) in 30 patients.
Nevertheless 28 went on to union at an average of 16 weeks.
Revision Tibiotalar arthrodesis.
J Bone and Joint Surg.2008.90-A:1212-1223.
M.E.Easley , H.E.Montijo ,J.B.Wilson ,R.D.Fitch ,J.A.Nunley.
45 patients reviewed who had undergone revision ( both primary revision and also 5 secondary revision cases).
External ring fixators used and overall 85% union rate


Reference

  • orthoracle.com
Dark mode powered by Night Eye